Pre-launch Checklist
A step-by-step checklist to complete before announcing your Zipper go-live date, with detailed guides for spot-checking member accounts, verifying recurring payments, and inviting customers to claim their accounts.
Work through this in the week before launch. The checklist comes first; detailed how-tos for the trickiest steps follow below.
✅ Account & Payments
- Stripe connected — Settings > Integrations → Stripe → status shows connected
- Test payment processed — run a test transaction end-to-end
- Stripe payout schedule confirmed — know when your first payout will arrive
- Failed payment recovery configured — Settings > Integrations → Stripe → failed invoice settings
✅ Classes & Appointments
- All classes created in Calendar with correct times, instructors, and locations
- Classes visible to customers — “Show in app” is on, registration is open
- Class capacity set on all timeslots
- Cancellation policy configured on each class type
- Appointment types created — all instructor availability schedules set up
- Booking windows set appropriately for appointments
✅ Products & Pricing
- All memberships and booking credits created in Products & Services
- Product prices match what you told members during migration
- Products visible to customers — “Show in app” enabled
- Forms attached to products that require waivers or intake
✅ Member Data
- Customer import completed — all members in the customer list
- Subscriptions imported — active subscribers show Active status
- Booking credits imported — credit balances are correct
- Spot-check complete — 10+ member accounts verified (see Spot-Checking Member Accounts below)
✅ Payment Methods (PAN Transfer)
- PAN transfer complete (or confirmed in progress for members without cards)
- Claim links ready for members whose cards weren’t transferred
- Recurring payments verified (see Verifying Recurring Payments below)
✅ Website & Booking Page
- Custom domain connected and showing green in domain settings
- Site published with current content
- Booking page accessible from the custom domain
- All navigation links working (no broken pages)
✅ Staff
- All staff accounts created and invited
- Pay rates assigned to all instructors
- Permissions configured (admin, manager, staff roles)
- Kiosk mode tested on front desk device
✅ Communications
- Migration announcement sent to all members
- Account invite emails sent to all members (see Inviting Customers to Claim Their Account below)
- Website updated with new Zipper booking URL
- Social media profiles updated with new booking URL
✅ Go-Live Readiness Call
- Readiness call completed with your Zipper onboarding rep
- Rep’s contact saved in phone for launch day support
If Everything Is Checked
You’re ready to launch. Set your go-live date and send the final announcement!
Spot-Checking Member Accounts
Before announcing go-live, spend 30 minutes spot-checking a sample of member records. Catching data issues now prevents billing problems and confused members on day one.
What to Check Per Member
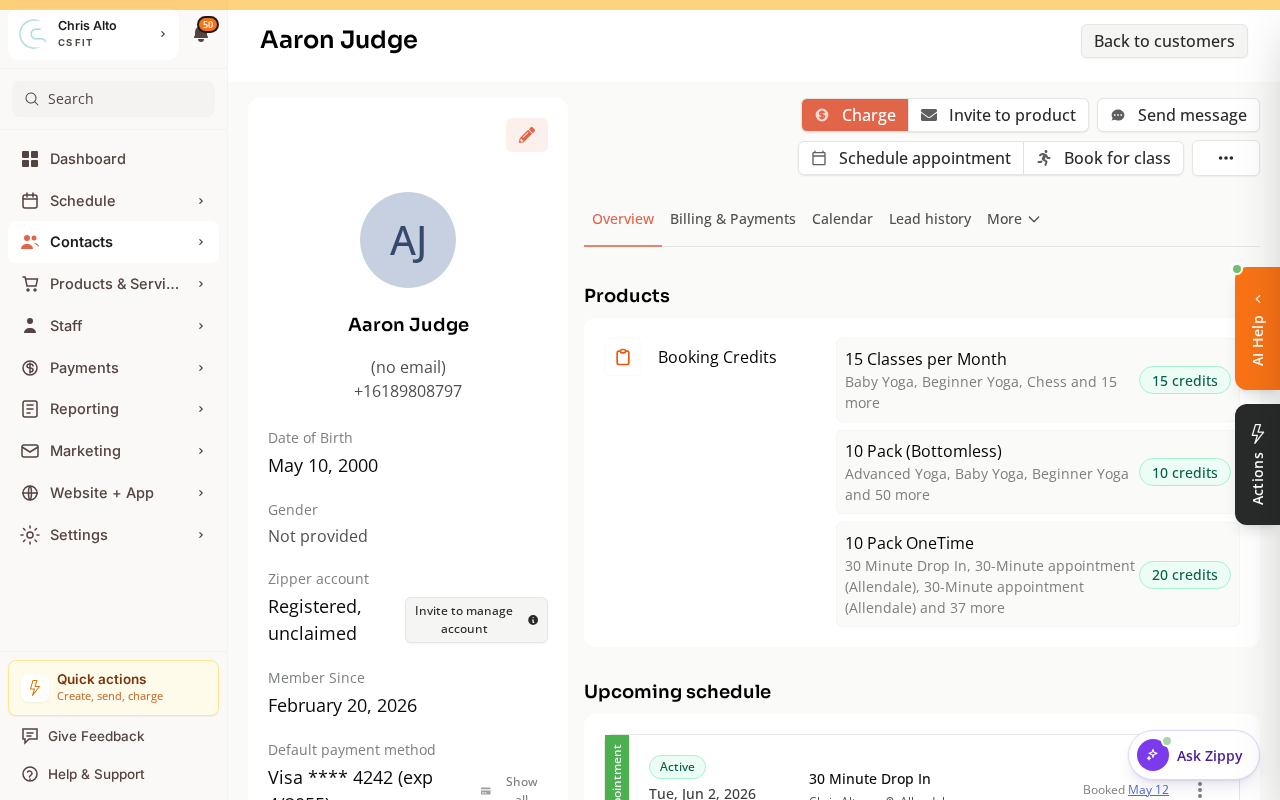
- Name and email are correct
- Phone number is on file (if you had it)
- Account claim status is correct (see below)
- Active subscriptions show the right plan name and amount
- Booking credits / booking credit balance is correct
- Tags are applied (if you used tags during import)
- Family/dependent links are correct (for family plan members)
Understanding Account Claim Status
| Status | What it means |
|---|---|
| Not registered | No Zipper account created yet — member hasn’t been invited or hasn’t signed up |
| Registered, unclaimed | A Zipper account exists for this email but isn’t connected to this profile yet |
| Registered ✓ | Member has an active Zipper account linked to this profile |
On launch day, most members will show “Not registered” until they claim their account. That’s expected — invite emails go out separately.
Steps
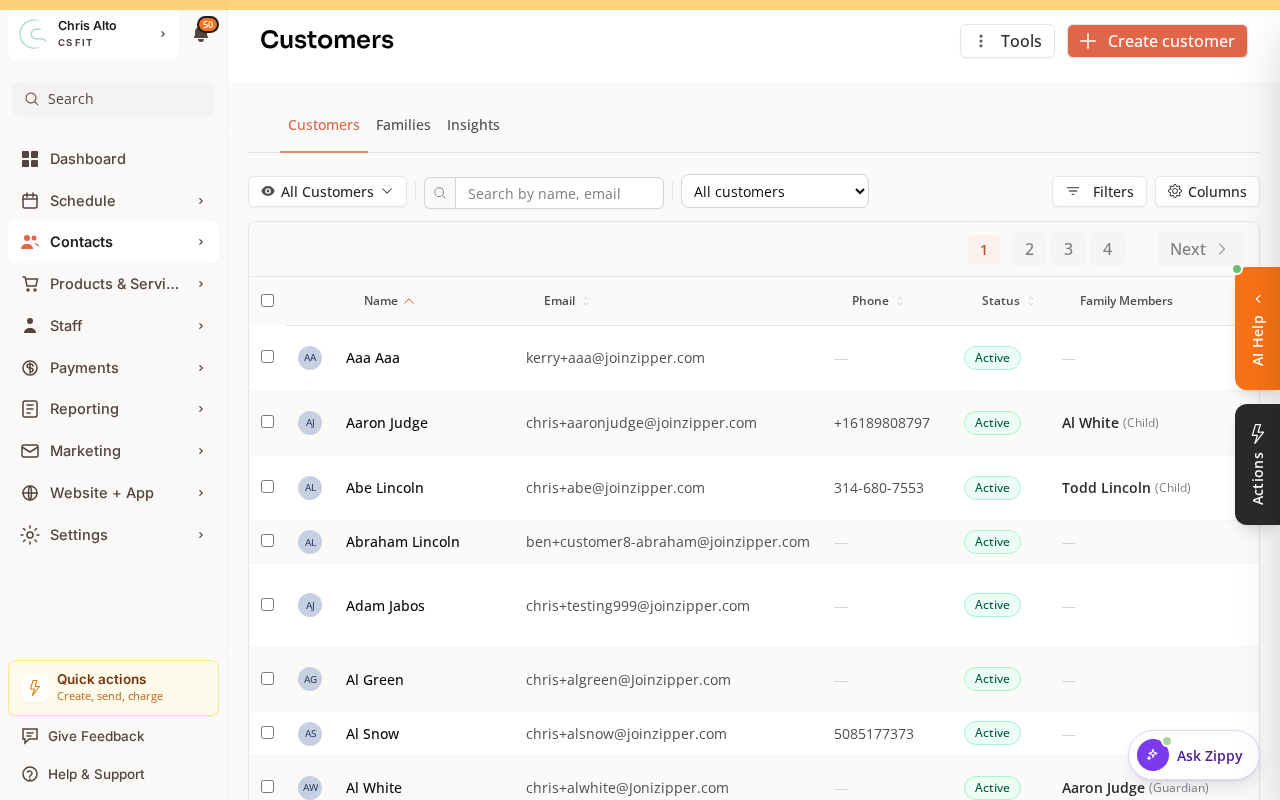
Step 1: Navigate to Contacts
- Navigate to: Contacts > Customers
Step 2: Sample your active subscribers first (highest priority)
These are the members who will be billed on day one — any errors here matter most.
- Use the filter bar to narrow to members with active subscriptions
- Spot-check 10–15 subscribers from different membership tiers and verify the checklist above for each
Step 3: Check a sample of booking credits holders
- Filter by members with remaining booking credits
- Spot-check 5–10 records — verify correct product name and credit balance
Step 4: Check family accounts
- Search for members with dependents and open 3–5 family accounts to verify parent-child relationships
Step 5: Check a sample of non-paying members
- Browse a few inactive or unsubscribed members and verify basic profile data (name, email)
Common Issues Found at This Stage
| Issue | What to do |
|---|---|
| Wrong subscription amount | Update the product price or re-import the subscription row |
| Wrong credit balance | Use Issue new Booking Credits on the customer’s billing tab to adjust |
| Missing member | Search by email — they may have been imported under a different name |
| Family link missing | Set up family account manually: customer profile → Manage family |
| Subscription on wrong product | Cancel and restart with the correct product, or contact your onboarding rep |
How Many to Check?
- Under 100 members: Check all active subscribers + a random 20% sample of the rest
- 100–500 members: Check all active subscribers + a random 10% sample
- Over 500 members: Check all active subscribers + spot-check by tier/type (5–10 per membership type)
Tips: Have your old platform export open in another tab for comparison. Log any discrepancies in a simple spreadsheet. If an entire subscription tier imported wrong, your onboarding rep can help with a bulk correction before launch.
Verifying Recurring Payments
After migrating to Zipper, confirm that subscriptions are billing correctly before your first renewal cycle.
1. Check subscription statuses in Zipper
- Navigate to: Contacts > Customers → filter by active subscriptions
- Spot-check 10–20 subscribers
- For each: verify the subscription shows Active, the product name is correct, and the next billing date is what you expect
2. Run a report after the first billing cycle
- After your first billing cycle completes (usually 1–4 weeks post-launch)
- Navigate to: Reporting > Reports, choose the Subscriptions category, and pull a subscription/revenue report for the period.
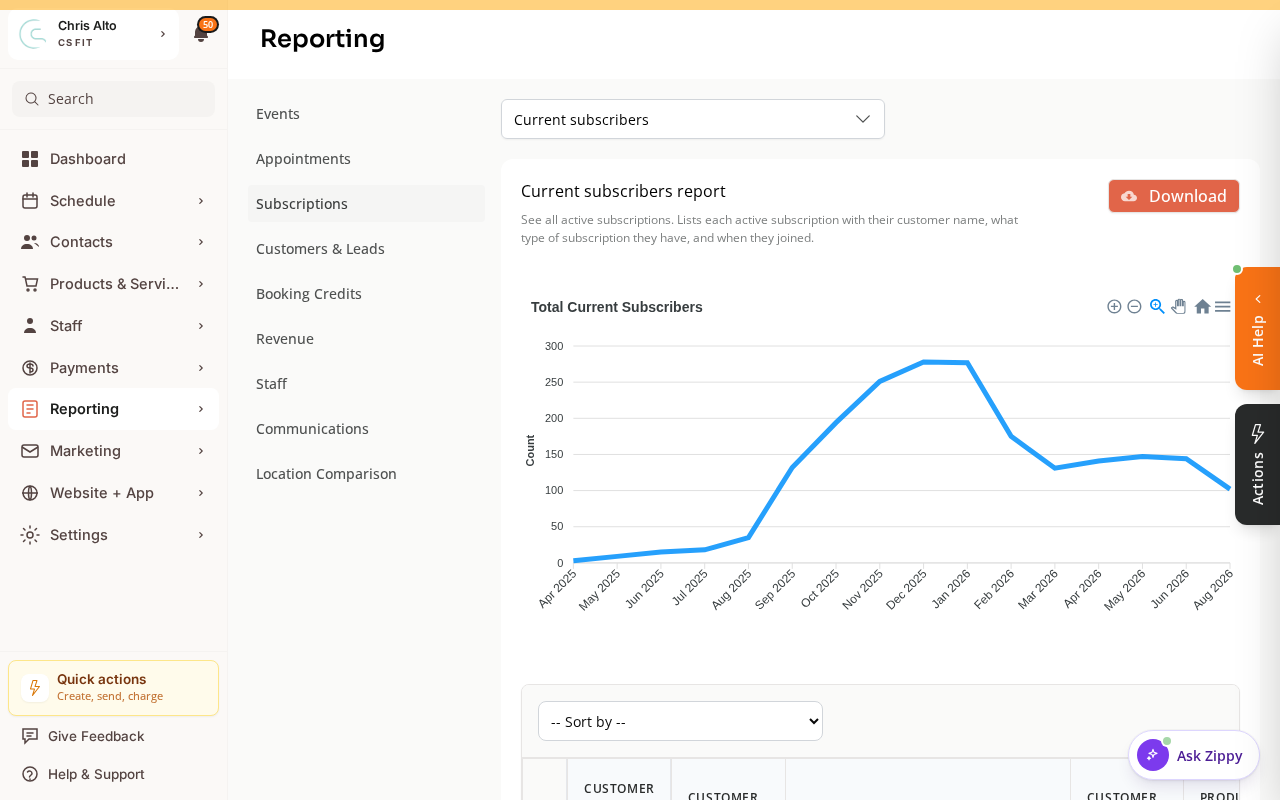
- Check total revenue against what you expected
- Look for any failed payments in Payments > Payment Collector → Failed Payments
3. Check for failed payments
- Navigate to: Payments > Payment Collector → Failed Payments
- Failed payments after migration usually mean a member’s card didn’t transfer (PAN transfer incomplete or card declined)
- For each failed payment: contact the member to update their payment method, or check if the PAN transfer for their card is still pending
4. Verify PAN transfer completion
- Confirm with your Zipper onboarding rep that all PAN transfers have completed
- Members whose cards didn’t transfer need to add a new card via their account portal
Common Issues and Fixes
| Issue | Fix |
|---|---|
| Subscription shows “Past Due” | Payment failed — check Payment Collector |
| Subscription missing entirely | Check if it was included in the import |
| Subscription billing wrong amount | Check product price settings |
| Member has duplicate subscriptions | Merge or cancel the duplicate via Contacts > Customers |
Run this check proactively in the first billing cycle — don’t wait for members to call. If you’re seeing systematic issues across many members, contact your onboarding rep.
Inviting Customers to Claim Their Account
Invite customers to claim their accounts so they can log in, update their profiles, and manage their own payments, subscriptions, and bookings.
Before You Begin
- Owner or admin permissions required
- Customer must exist in Contacts > Customers with a valid email address
Steps
- Go to Contacts > Customers, find the customer (search by name or email), and click their name.
- Verify the email address on file is correct — the invite goes to that address.
- Click Invite to claim account (in the top actions area or customer actions menu).
- Confirm to send.
If the customer has already claimed their account, the invite option won’t appear.
What the Customer Receives
An email with a secure link to set a password and claim their account. Once claimed, they can log in at https://app.joinzipper.com to view bookings and purchase history, manage payment methods via the Stripe portal, and update their profile.
Troubleshooting
A subscriber’s membership shows as “Canceled.” This sometimes happens if the import date was set in the past. Check with your onboarding rep — a subscription restart may be needed.
I can’t find a member in the CRM. Search by email address (not just name). Check that they were included in the import spreadsheet. If still not found, they may need to be added manually or re-imported.
“Invite to claim account” button not visible. The customer may have already claimed their account, or may not have a valid email address on file.
Customer didn’t receive the invite. Check the email address is correct, ask them to check spam, and resend the invite from their profile if needed. Invite links expire — resend a new one if the old link no longer works.
Need a hand?
Email our team at support@joinzipper.com and we'll usually reply within a few hours.
Was this article helpful?
Thanks for your feedback.