How to Add Retail Products (Skip Optional Fields)
Create a simple retail product in minutes by filling in only the required fields. You can always add more detail later.
Steps
Step 1: Go to Products & Services
- Navigate to: Products & Services > Manage Plans
- Click: Create product
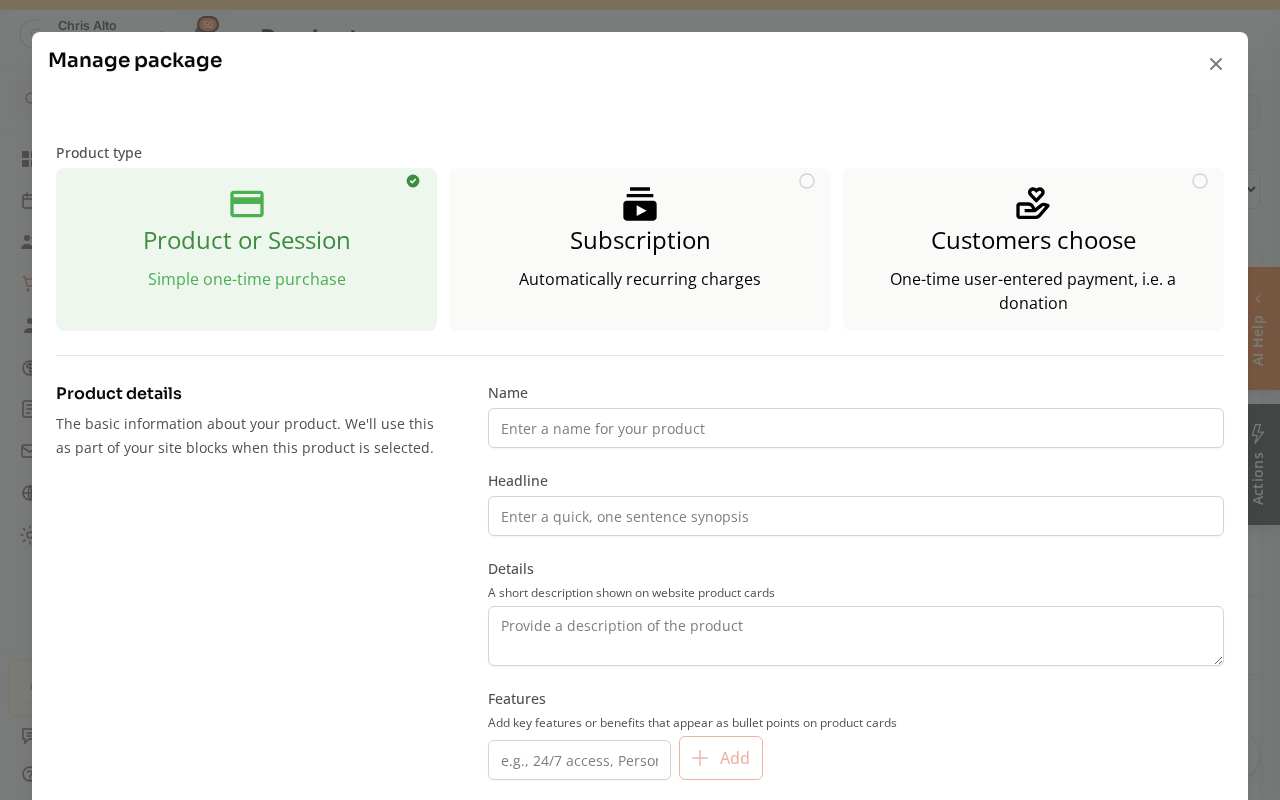
Step 2: Select the product type
- Select: Product or Session — the default, a simple one-time purchase. (Subscriptions and “Customers choose” are for memberships and donations.)
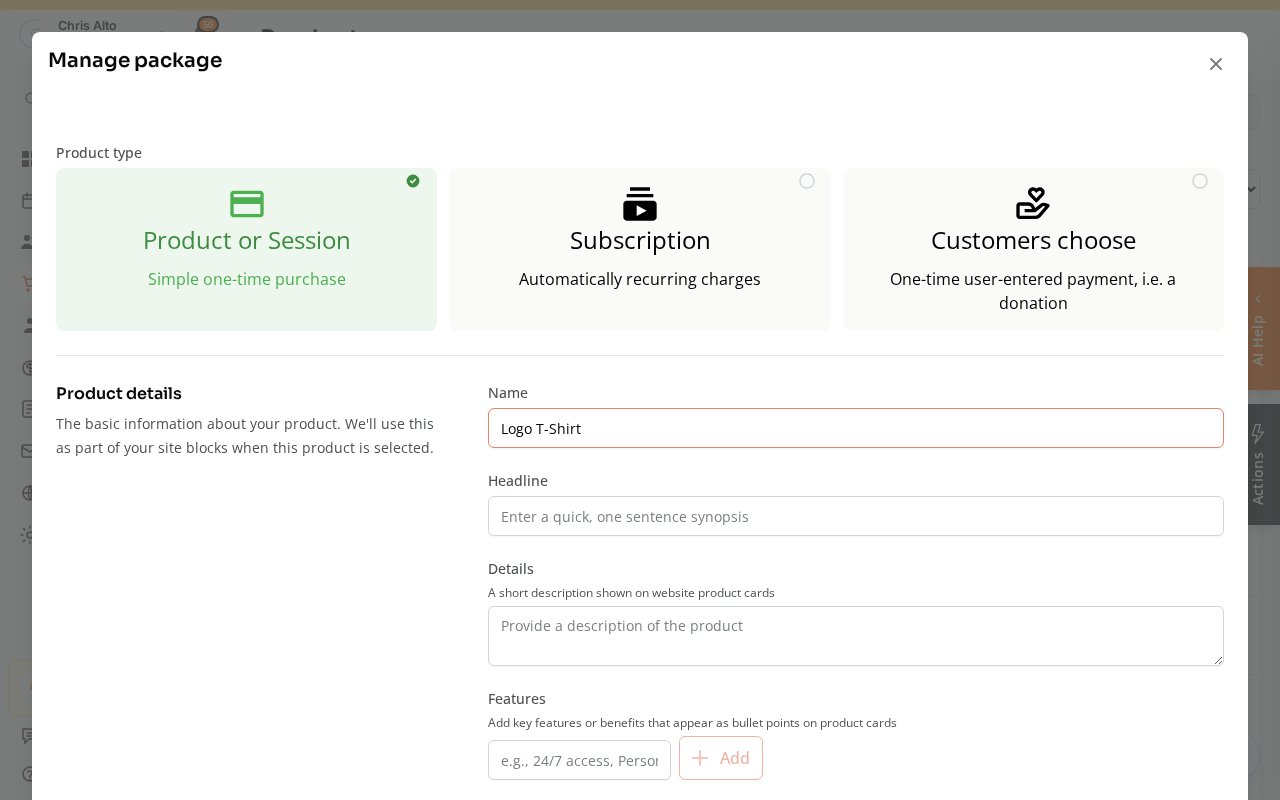
Step 3: Fill in the required fields only
Required:
- Name: What it’s called (e.g., “Logo T-Shirt”, “Water Bottle”)
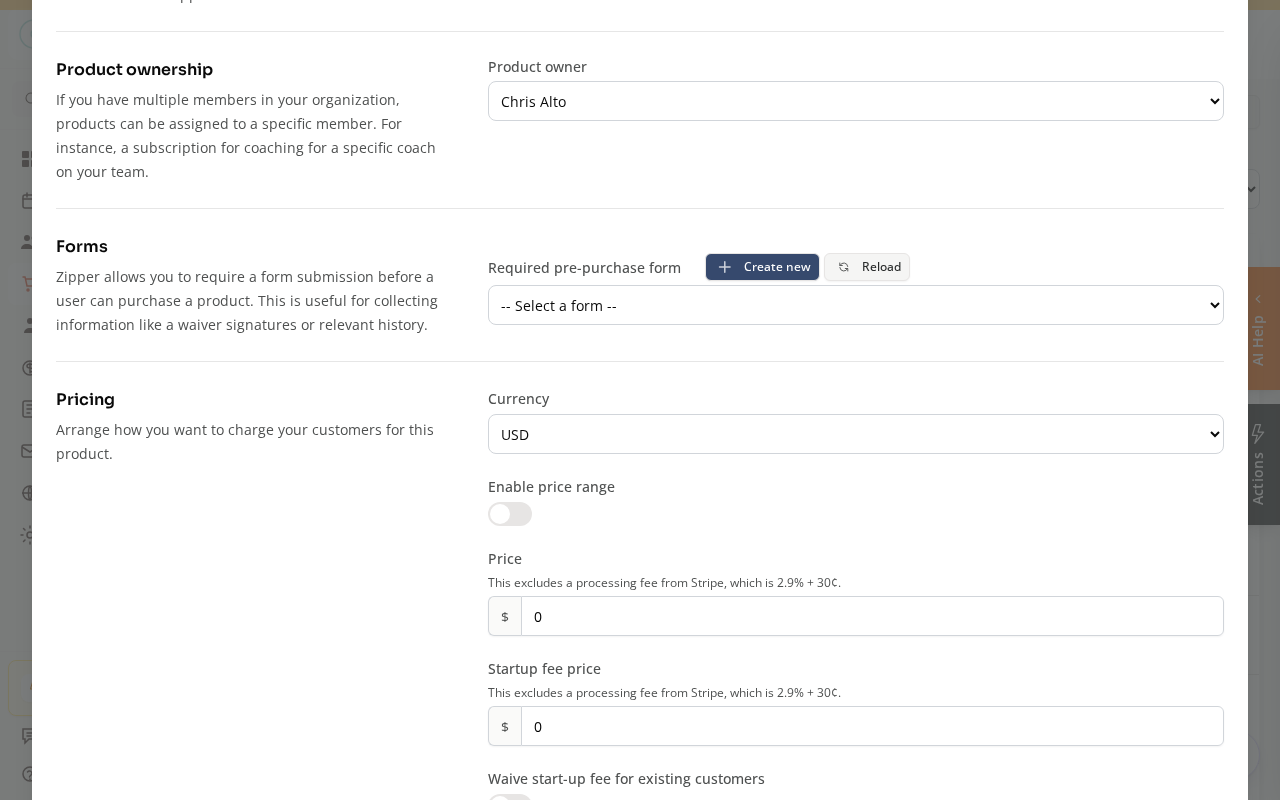
- Price: The amount in dollars, set in the Pricing section.
Skip these optional fields (you can add them later):
- Description, headline, features list
- Product image
- Required pre-purchase form
- Purchase limit and startup fees
Step 4: Save
- Click: Save / Create product
On Mobile
Same steps — product creation works on mobile browser.
Tips
- Visibility: New products default to “Show in customer app” enabled. Turn that toggle off if you want to keep it private until you’re ready to sell.
Troubleshooting
Product was created but isn’t showing in the customer shop. Check that “Show in customer app” is enabled on the product. New products are visible by default, but it’s worth confirming.
I need to track inventory. Go back to edit the product and enable inventory tracking — it’s optional but available if you need to limit quantity sold.
Need a hand?
Email our team at support@joinzipper.com and we'll usually reply within a few hours.
Was this article helpful?
Thanks for your feedback.