How to Add a Member's Guest to a Class
Register a member's guest for an upcoming class when you're planning ahead from the admin — not at the door.
Steps
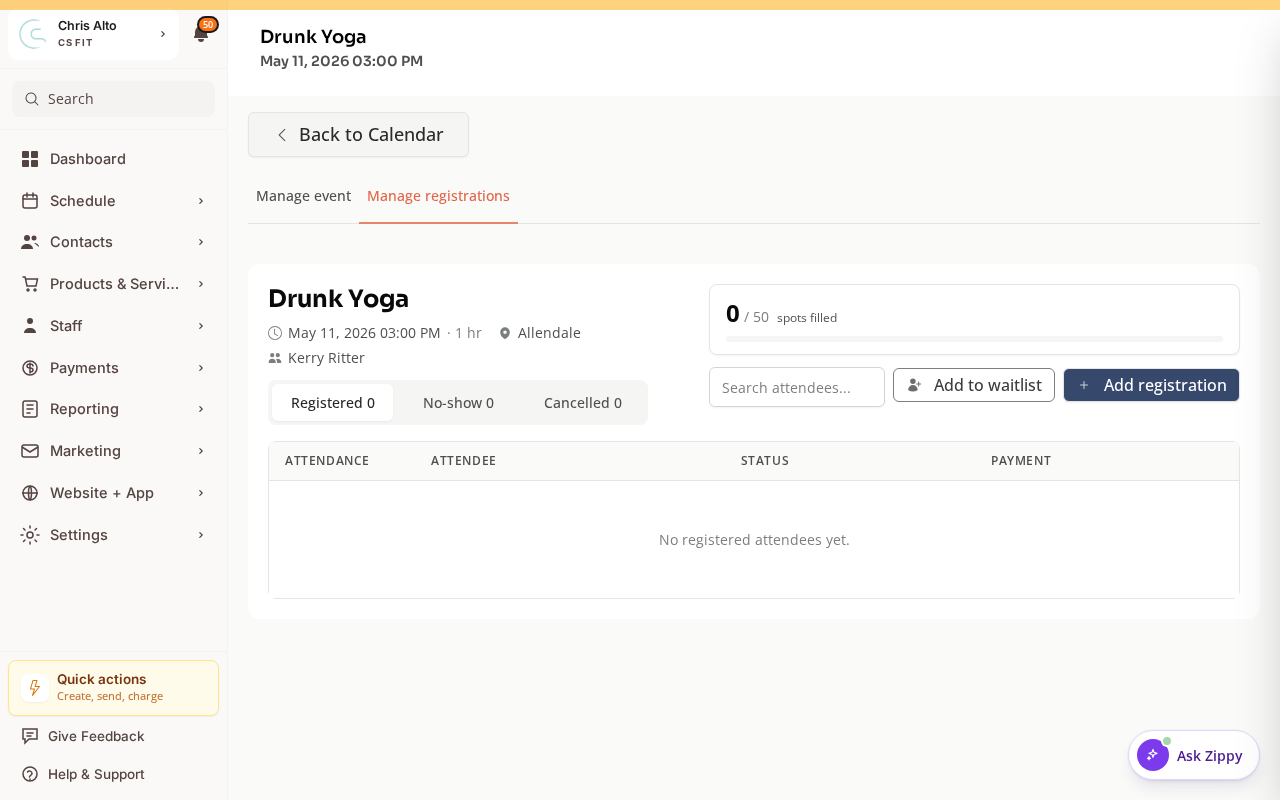
Step 1: Open the class in Calendar
- Navigate to: Schedule > Calendar, click the class session, then open the Manage registrations tab.
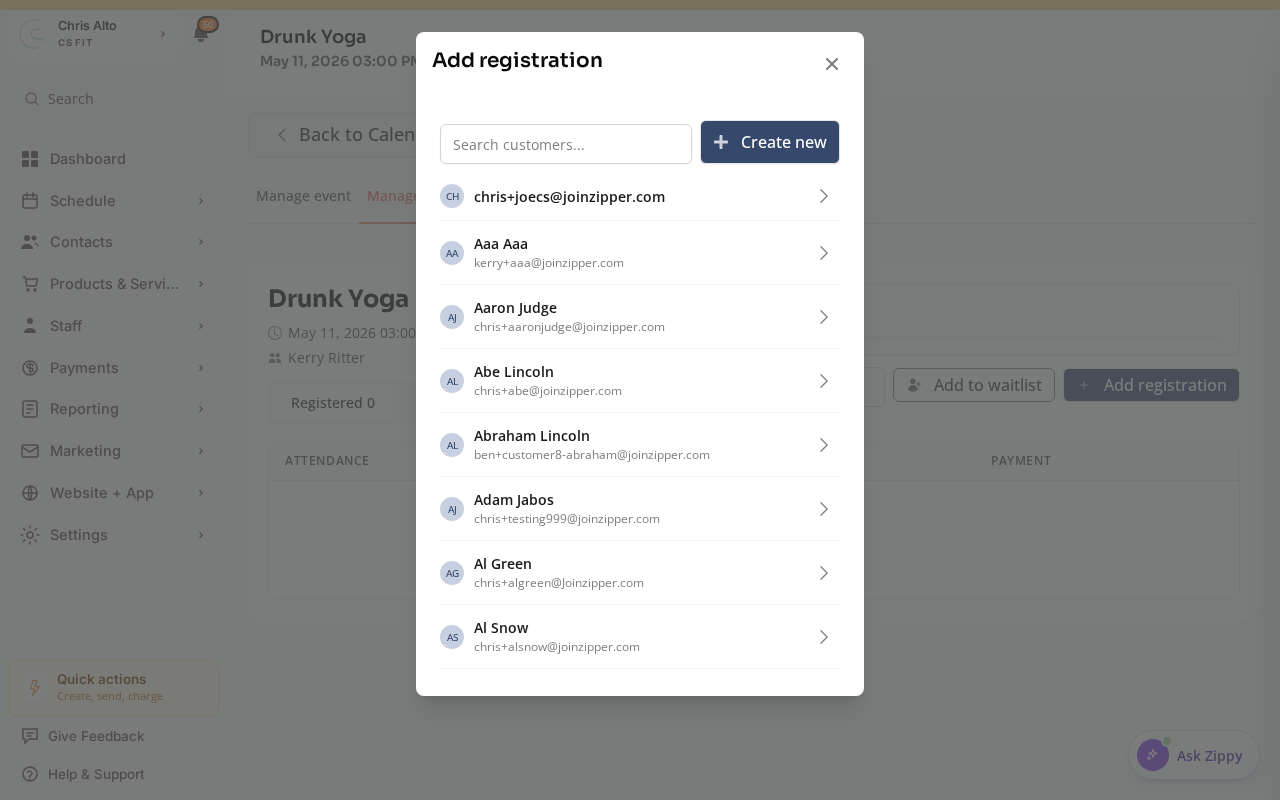
- Click Add registration, search for the guest, or click Create new to add a guest who isn’t in the system yet.
Step 2: Add the guest
- In the modal, select the member who is bringing the guest, then use Add guest (or the option to add a second person)
- Enter the guest’s name (and email if required)
- Select the payment option (drop-in, member’s guest pass, etc.)
- Click: Continue / Register
Alternative: From the Member’s CRM Profile
- Navigate to: Contacts > Customers, find the member → click their name
- Click: Schedule → find the upcoming class
- Add the guest from the member’s profile booking flow
Tips
- Guest check-in: Guests registered this way appear in the class registrant list and can be checked in like any other registrant.
- Guest passes: If your studio has a “guest pass” product, select it as the payment option when registering the guest.
Troubleshooting
I don’t see an option to add a guest. The ability to add a second person to a booking depends on the class’s capacity and settings. If the class is full, you’ll need to increase capacity first.
Need a hand?
Email our team at support@joinzipper.com and we'll usually reply within a few hours.
Was this article helpful?
Thanks for your feedback.