How to Add a Custom Font to Your Branded App
Upload a custom font to your Zipper site so your brand typography appears consistently throughout the customer-facing experience.
Steps
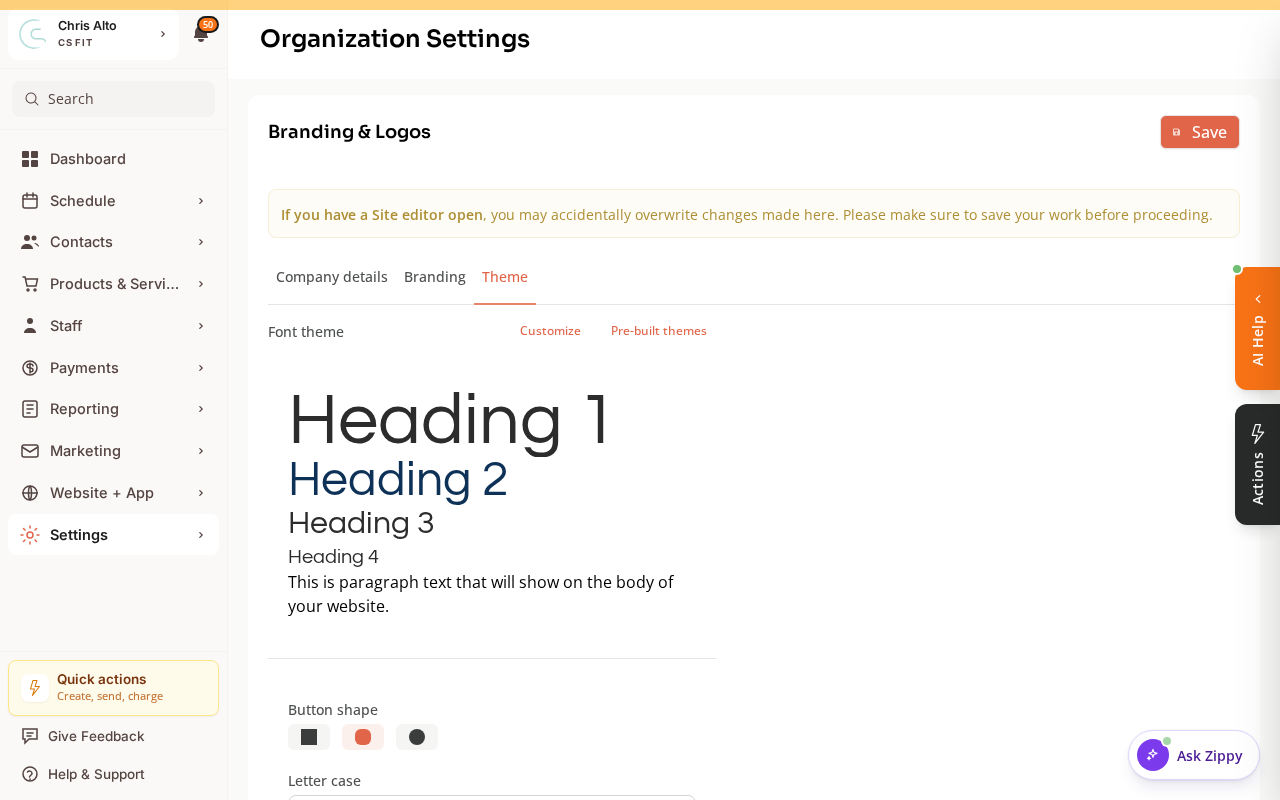
Your typography is controlled under Settings > Organization Settings > Theme, in the Font theme section (with a live preview of headings and body text). Use Customize to set fonts or Pre-built themes to pick a ready-made pairing.
For uploading a fully custom font file:
- Navigate to: Website + App > Site Editor
- Open Site settings → Theme
- Find the Fonts section
- Click: Add custom fonts (or Upload font)
- Upload your font file (formats: WOFF, WOFF2, TTF, OTF)
- After upload, set the font as:
- Heading font — for titles and large text
- Body font — for paragraphs and regular content
- Click: Save and then Publish
Font File Formats
| Format | Recommended? |
|---|---|
| WOFF2 | Best — smallest file size, universal browser support |
| WOFF | Good fallback |
| TTF/OTF | Works but larger file size |
Tips
- License matters: Make sure you have a web license for the font before using it commercially.
- Test on mobile: Fonts can look different at small sizes. Preview the mobile view before publishing.
- Fallback fonts: Zipper uses system fonts as fallbacks if a custom font fails to load.
Troubleshooting
The font uploaded but isn’t showing on the site. Confirm you published after uploading (saving in the editor doesn’t publish changes). Also check that the font is selected for heading or body text — uploading alone doesn’t apply it.
Need a hand?
Email our team at support@joinzipper.com and we'll usually reply within a few hours.
Was this article helpful?
Thanks for your feedback.